The Springfield Armory 1911 pistols are extremely popular for self-defense, competition, target shooting and hunting.

Both experienced shooters andfirst-time gun buyersfind a great deal of quality and value throughout the line.

The 1911 is unique in many ways.

Do you know how to field strip a 1911 to clean it? This image shows the initial stage of disassembling a classic 1911 pistol. The photo captures a well-lit workbench with organized tools such as punches, screwdrivers, and cleaning brushes. The slide, barrel, and frame are arranged neatly, ready for detailed inspection. It highlights the importance of proper firearm maintenance and safe disassembly procedures before cleaning. The visual clearly emphasizes a step-by-step approach to dismantling a 1911 pistol.

The Springfield Armory Workbench series of videos gives Springfield Armory firearm owners a handy guide to caring for their firearm.

It was first adopted by the United States armed forces for its issued handgun in 1911.

I wont go into that, as it’s possible for you to find out the whole storyhere.

And in my opinion, it also has the most intuitive grip angle of handguns sold today.

In this close-up, the disassembly process of a 1911 pistol’s slide is in progress. The image details the careful removal of the slide from the frame, showcasing precision and attention to safety. Tools like the punch and screwdriver are visible and emphasize the importance of correct firearm handling. The scene underscores the significance of maintaining proper alignment during disassembly. This picture is an essential guide for proper 1911 pistol maintenance and cleaning.

The series covers firearms such as the 1911, Hellcat, SAINT and more.

In that video, I discuss in detail basic firearms care/maintenance of the 1911 pistol.

Always ensure the firearm is unloaded and clear.

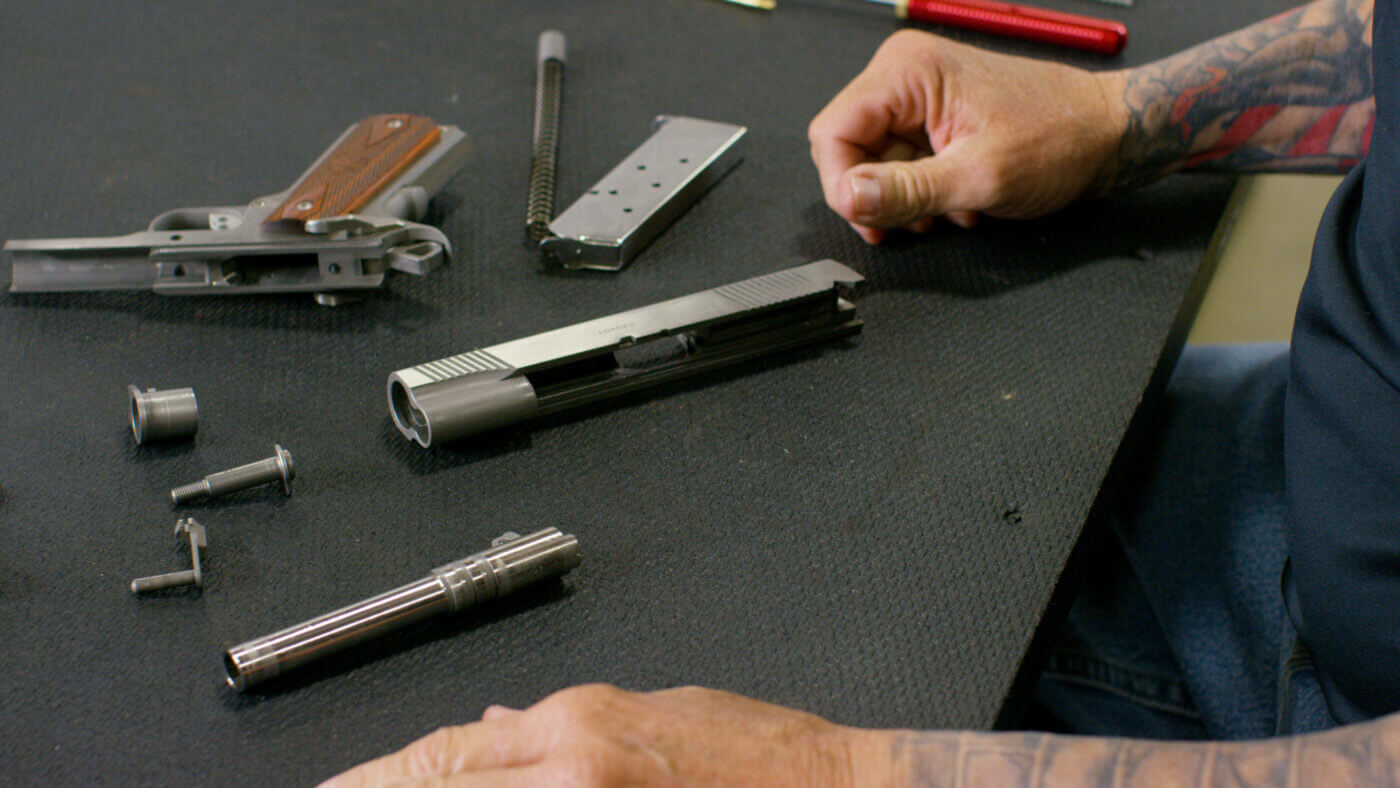
From here I pull the slide back to the point where the slide stop engages the disassembly notch.

This image captures the detailed removal of the barrel from the 1911 pistol during the disassembly process. The barrel is shown separated from the slide, highlighting its smooth finish and intricate rifling. Fine cleaning brushes and cloths are arranged nearby to signal the upcoming cleaning steps. The photo demonstrates careful handling to avoid damage, reinforcing best practices in firearm care. It serves as a comprehensive guide for dismantling a 1911 pistol for thorough cleaning.

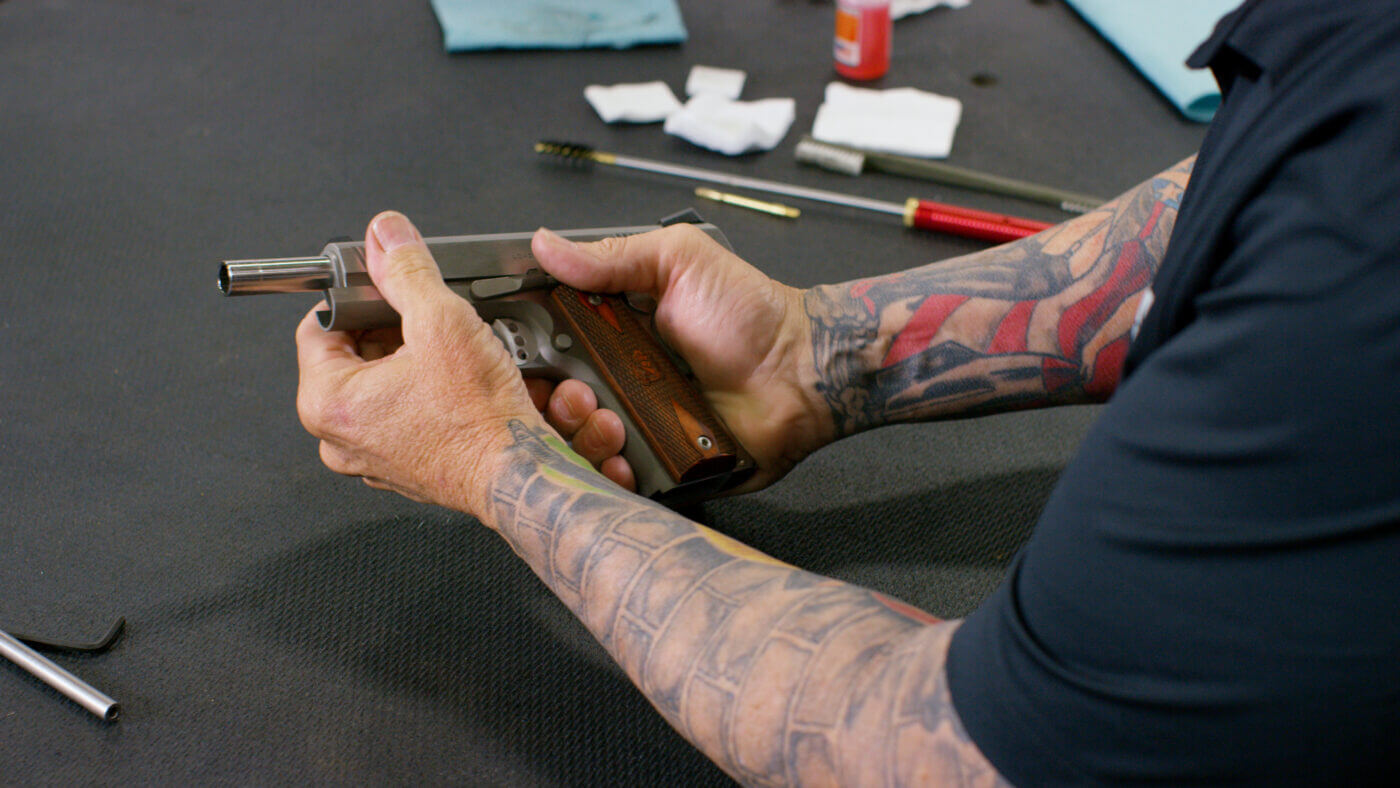
Before you tear down your 1911, you must ensure that it is clear and empty.

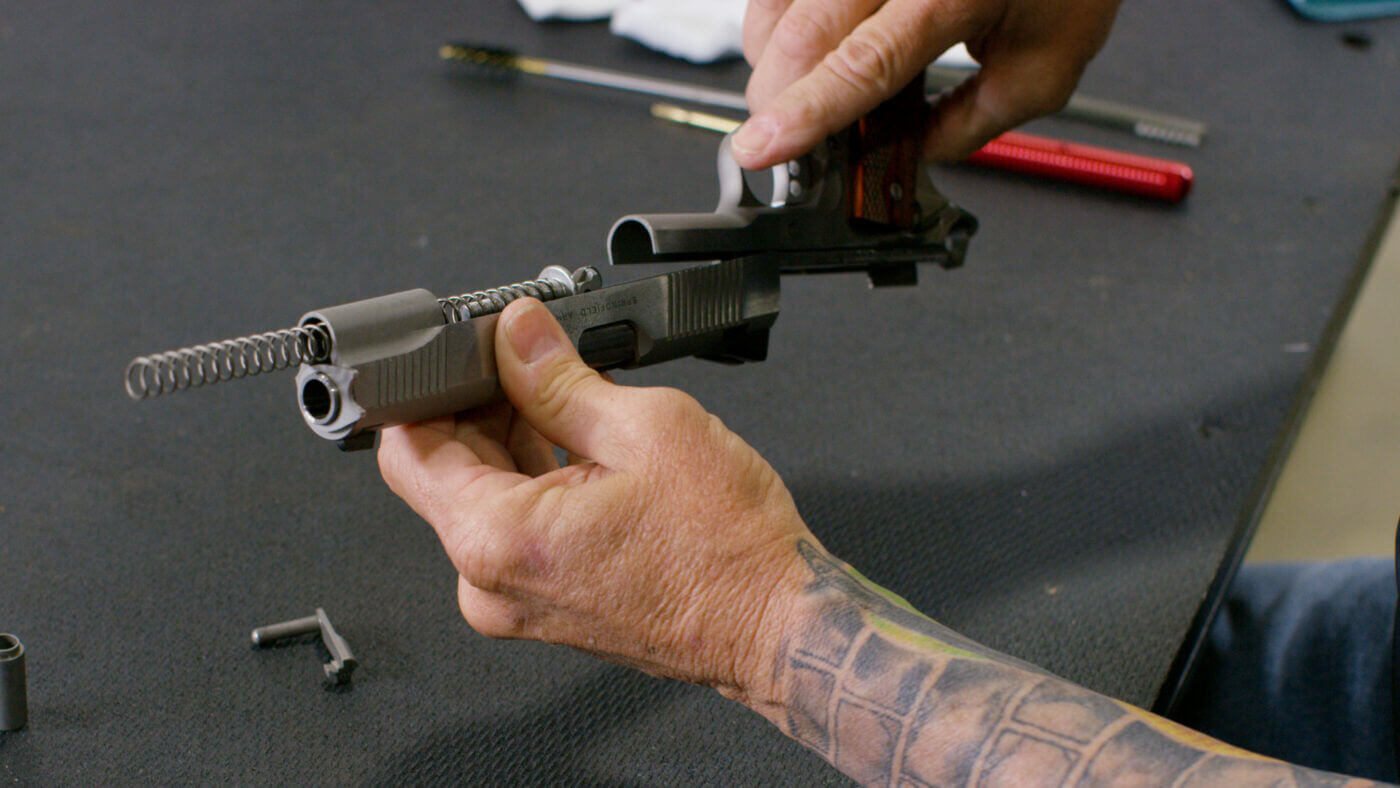
From here, all that is left is to remove the bushing, recoil spring plug and barrel.

Your 1911 is now field-stripped.

Moving on to the frame, I like to use my M16 brush to brush and loosen any fouling.

The picture focuses on the extraction of the recoil spring assembly from a 1911 pistol. Every component, including the guide rod and spring, is carefully separated to illustrate the detailed disassembly process. The image emphasizes precision and safety, with each part organized for subsequent cleaning. This view provides an educational insight into the mechanics of the 1911 pistol. It is an ideal visual reference for firearm maintenance and comprehensive cleaning procedures.

Doing a standard fieldstrip of your pistol is must for proper maintenance and care.

The M16 brush is a toothbrush-looking tool, but with a strip of small bristles on the opposite end.

I then wipe the recoil spring, guide rod and bushing off with a red shop rag.

I run a bead on the frame rails and the slide rails.

This detailed image shows the removal of the trigger group from the 1911 pistol frame. The trigger, hammer, and associated pins are neatly laid out to demonstrate each step of the disassembly process. Tools such as punch sets and small screwdrivers are visible, highlighting proper technique and attention to safety. The shot reinforces the importance of detailed cleaning and lubrication of moving parts for optimal firearm performance. It serves as an informative guide for both disassembling and cleaning a classic 1911 pistol.

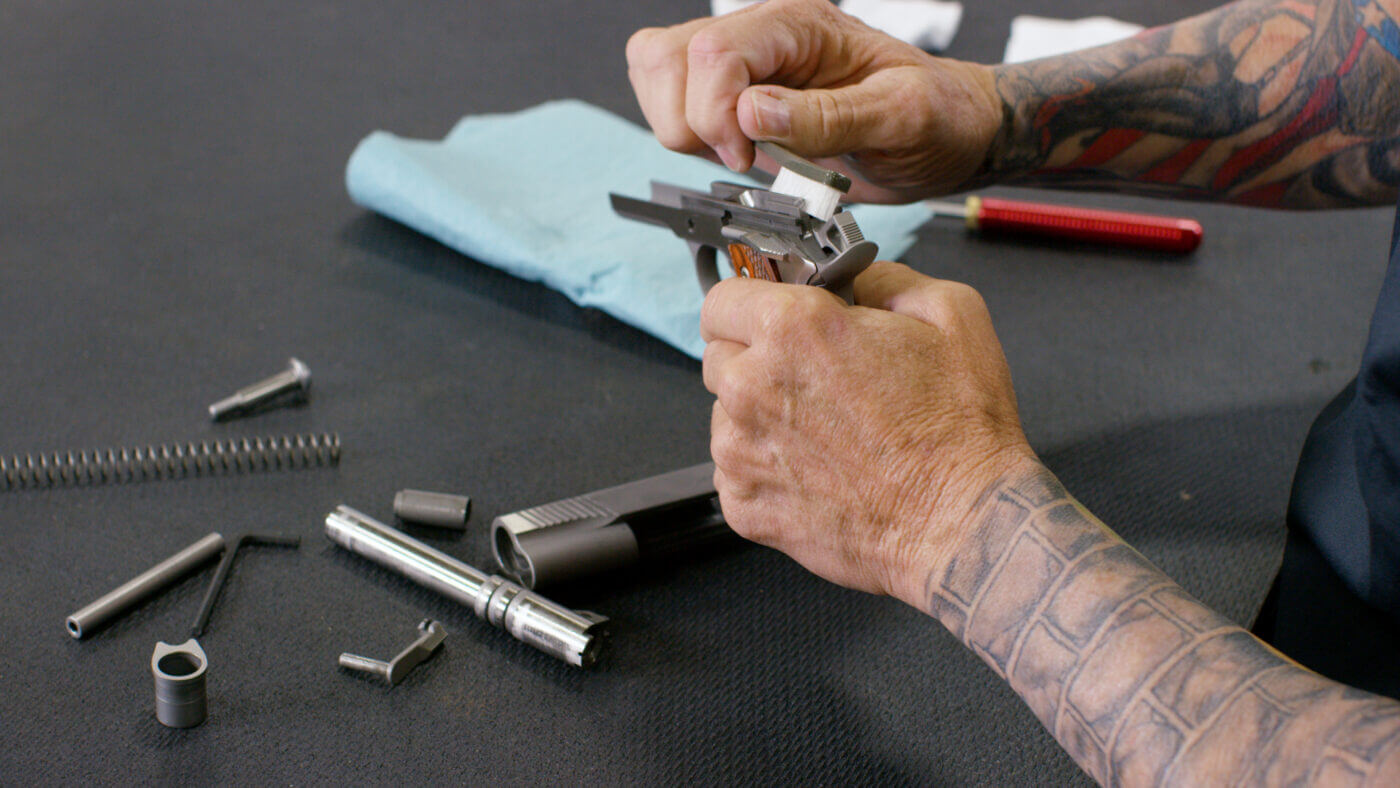
Cleaning grime and fouling from your pistol is an important step in the cleaning process.

You dont need much, so experiment with how much oil to use on your 1911.

I also put a few drops on the recoil guide rod and spring.

I can now reassemble the 1911.

Here, the disassembly of the grip panels and magazine well from a 1911 pistol is illustrated. The image highlights the careful extraction of internal components, including the magazine release and safety mechanisms. Detailed close-ups show how each part is handled and organized for cleaning and maintenance. The scene emphasizes best practices in firearm disassembly with a focus on preserving the integrity of the 1911 pistol. This view is essential for understanding the comprehensive maintenance process of classic pistol models.

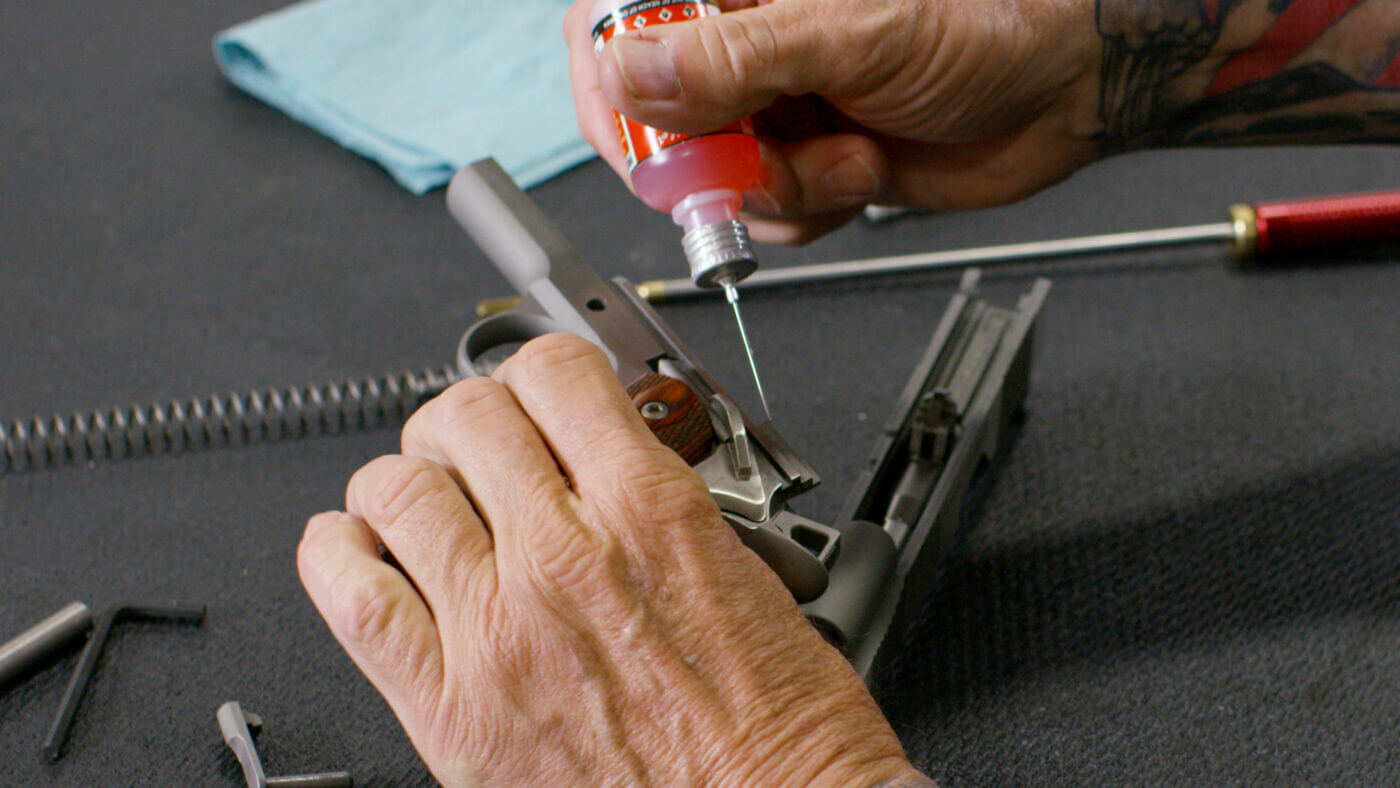
Proper — but not excessive — lubrication is an integral part of ensuring the longevity of your 1911.

Rotate the bushing in the slide, which will allow you to set up the recoil spring plug.

Then roll out the short portion of the recoil guide rod into the closed end of the spring.

Screw it together with the included hex wrench and tighten it down.

This image shows the meticulous cleaning process of the 1911 pistol’s slide after disassembly. The slide is being scrubbed with specialized cleaning brushes and solvent to remove carbon buildup and residue. Detailed textures on the metal surface and carefully arranged cleaning supplies emphasize thorough firearm maintenance. The picture demonstrates the combination of disassembly expertise and precise cleaning techniques. It is a step-by-step visual guide for ensuring the longevity and reliability of a 1911 pistol.

Reassembly of the 1911 is not difficult if you follow the correct steps.

Conclusion

Your 1911 is now assembled.

Go to forum thread

1911Series

1911 Series

Facebook Share

Twitter Share

Pinterest Share

Article image

Article image