The M14E2 Unicorn
Small arms evolve over time.
Sometimes the result is something like the paradigm-shifting German StG44.
Other times its the ambitious but dead-ender WWI-era French Chauchat.

This semi-auto DIY build of the ultra-rare M14E2 was done with SARCO, Inc. parts and a Springfield Armory M1A. Image: Jake Miller/Springfield Armory
For me, the M14E2 sits somewhere in the middle.
But how did the M14E2 in all its wonderful weirdness come about?
The appeal of simplified logistics was likely a driving force behind this plan.
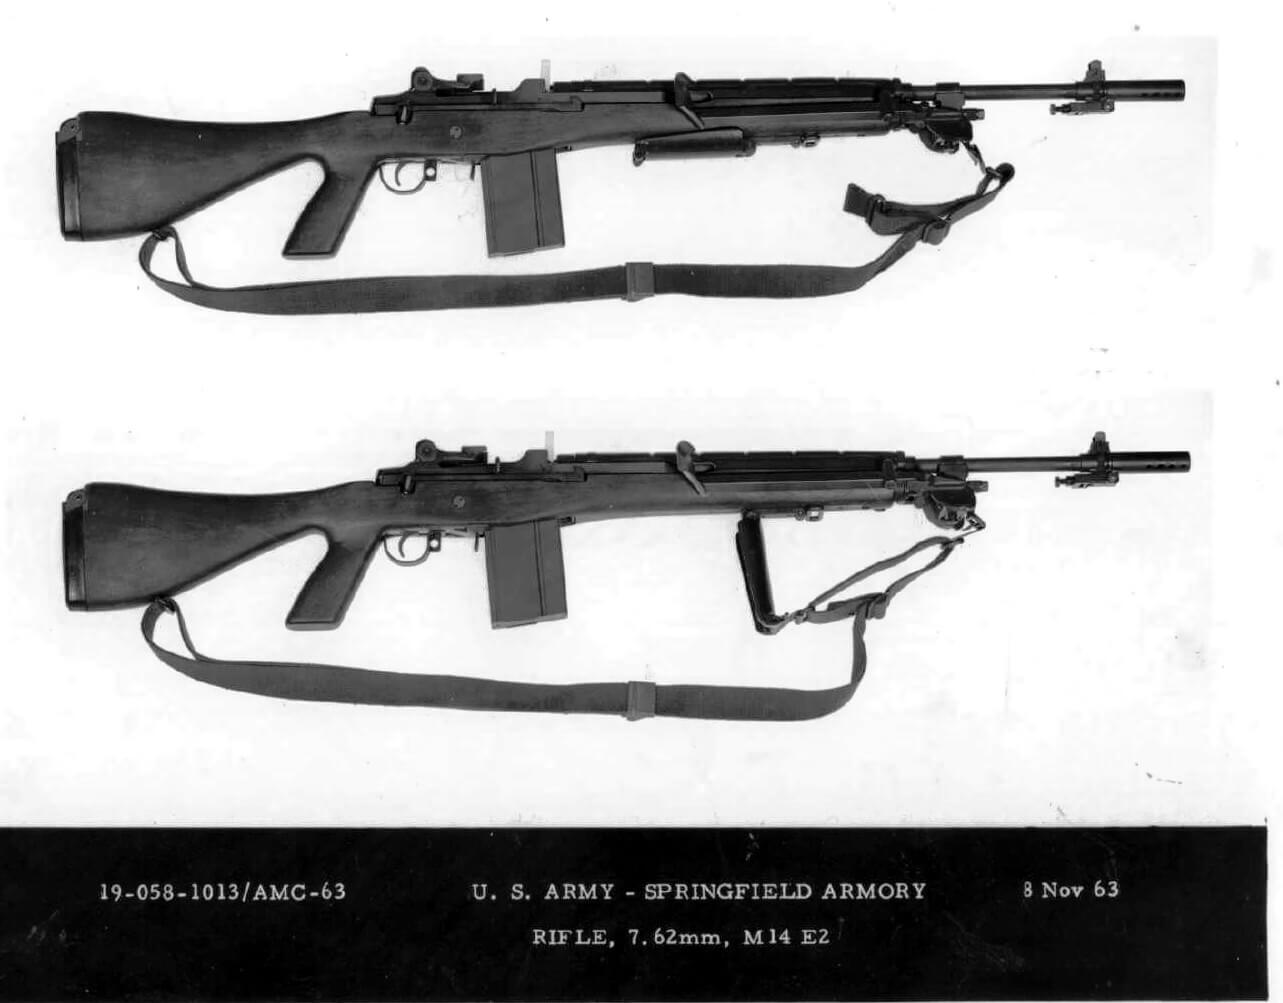
The M14E2 was designed to take over the “squad automatic” role. Designated M14A1 during 1966, it weighed in at 14.5 pounds. Image: NARA
To address this, the M14E2 was developed.
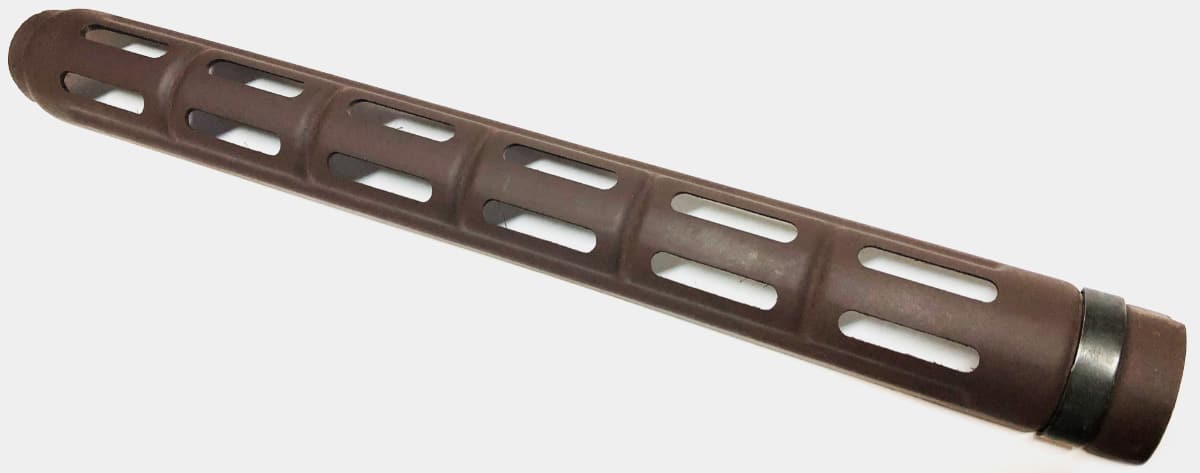
A slotted synthetic handguard helped facilitate barrel cooling.
The end result looked about as awkward as some mad scientists hybridized duck-monkey.

Magazine capacity, sustained fire capability, and controllability during full-auto firing were often cited as complaints about the M14E2. Image: NARA
However, the gun fits the human form beautifully and runs like a scalded ape.
Original buttstocks and parts on the civilian market were few and far between, with commensurately high prices.
Enter SARCO, Inc.
[For more information on theM14 in the Vietnam War, click here.]

A rare view of an M14E2 (also called M14A1) in service with the 1st Infantry Division in Vietnam during 1966. Image: NARA
Which brings us back to the topic at hand.
If you have a rifle like an M1A for the build, they offer practically everything else you need.
[Need a new M1A stock, but not wanting to do a full M14E2 build?

Some of the M14E2s were passed to the allied Vietnamese troops. This example is seen with ARVN Rangers during the Tet Offensive. Image: NARA
Check out theTop 5 M1A Stock Systems.]
M14E2 Build Parts
Building up your own M14E2 clone is a DIY home project of modest complexity.
Im comfortable around tools, but Im not a professional gunsmith.
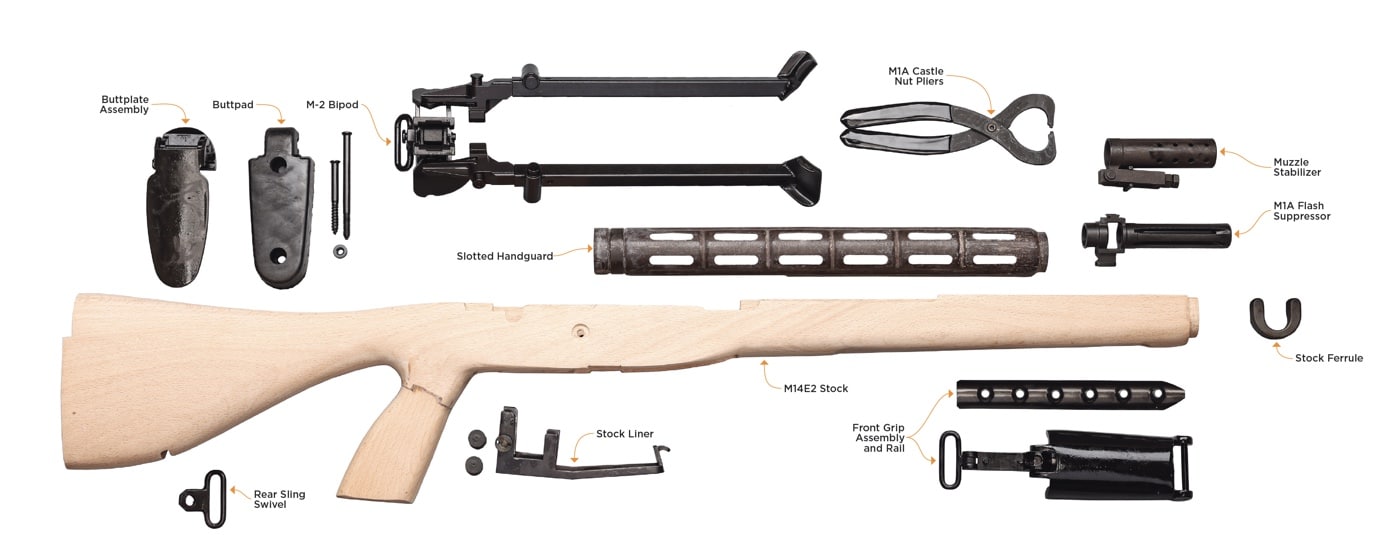
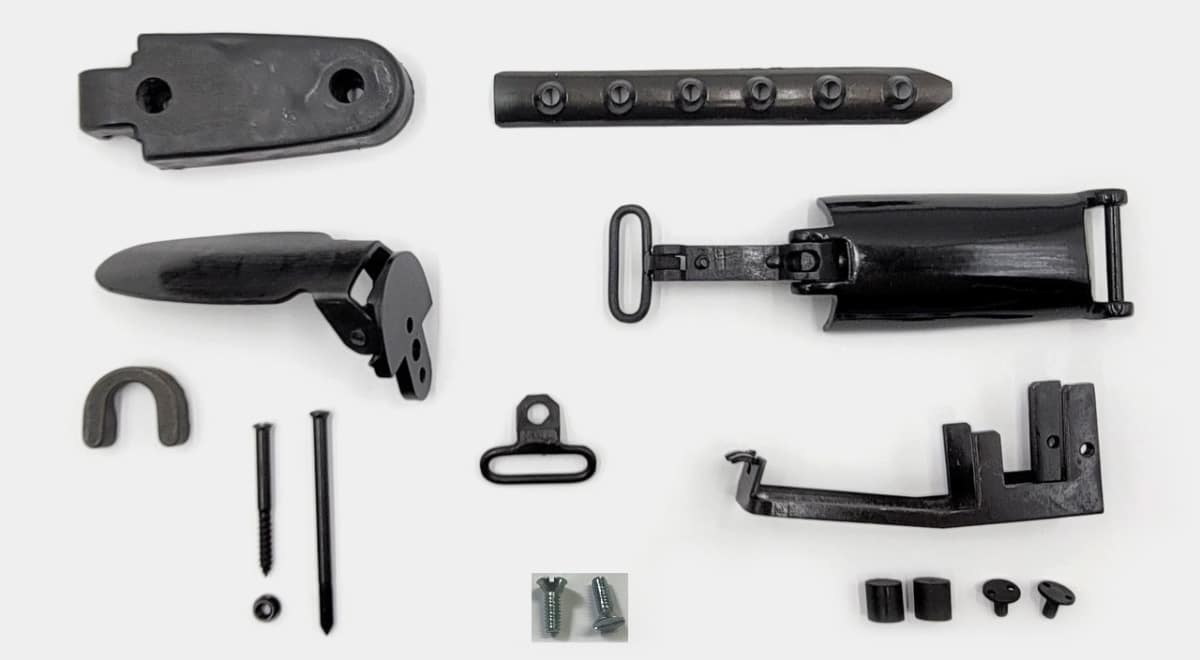
Short of the rifle and a few accessories, SARCO offers all the primary parts you need to get started on your own M14E2 build. Image: Jake Miller/Springfield Armory
If you struggle to change the oil in your car, you might want to sit this one out.
In addition to the SARCO parts, I acquired a Standard Issue Springfield Armory M1A with a synthetic stock.
I binned the stock and used the basic barreled action as a starting point.

The difference in the M1A/M14 stocks and the M14E2/M14A1 stocks are immediately obvious. Image: Jake Miller/Springfield Armory
Be sure to check your local laws.
The OD canvas sling from the Springfield Armory Store is a good fit for this project.
To use it on the M14E2, you rig it backwards.
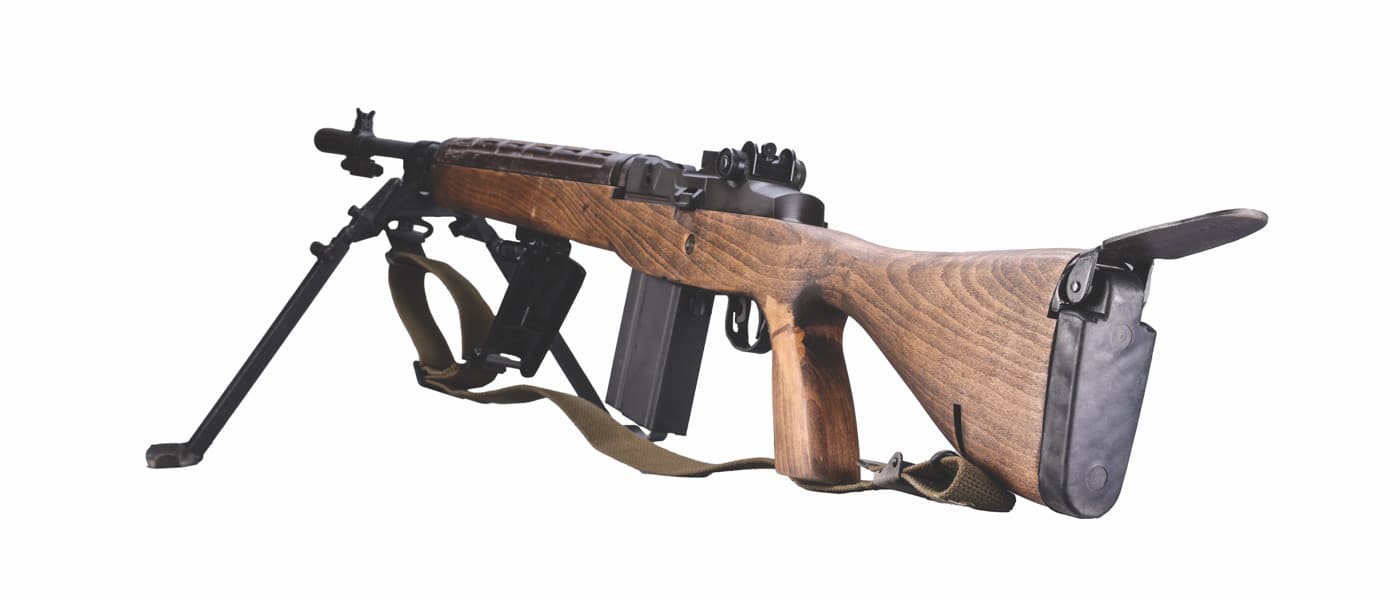
The original M14E2 designed offered several adaptations — like a vertical pistol grip, rubber buttpad, front grip and more — to make full-auto fire more controllable. Image: Jake Miller/Springfield Armory
The sliding keeper goes on the rear, while the Parkerized hook locks the front grip in place.
The Springfield Armory Store also offers the M-2 bipod, which is a great fit for this project.
The bipod is rugged steel with a Parkerized finish.

Note the angled front grip for enhanced control and the M-2 bipod fitted to the rifle. Image: Jake Miller/Springfield Armory
Press a button on the side to deploy or stow each leg.
The legs are readily adjustable for command height.
Read ourM1A bipod reviewfor more information.
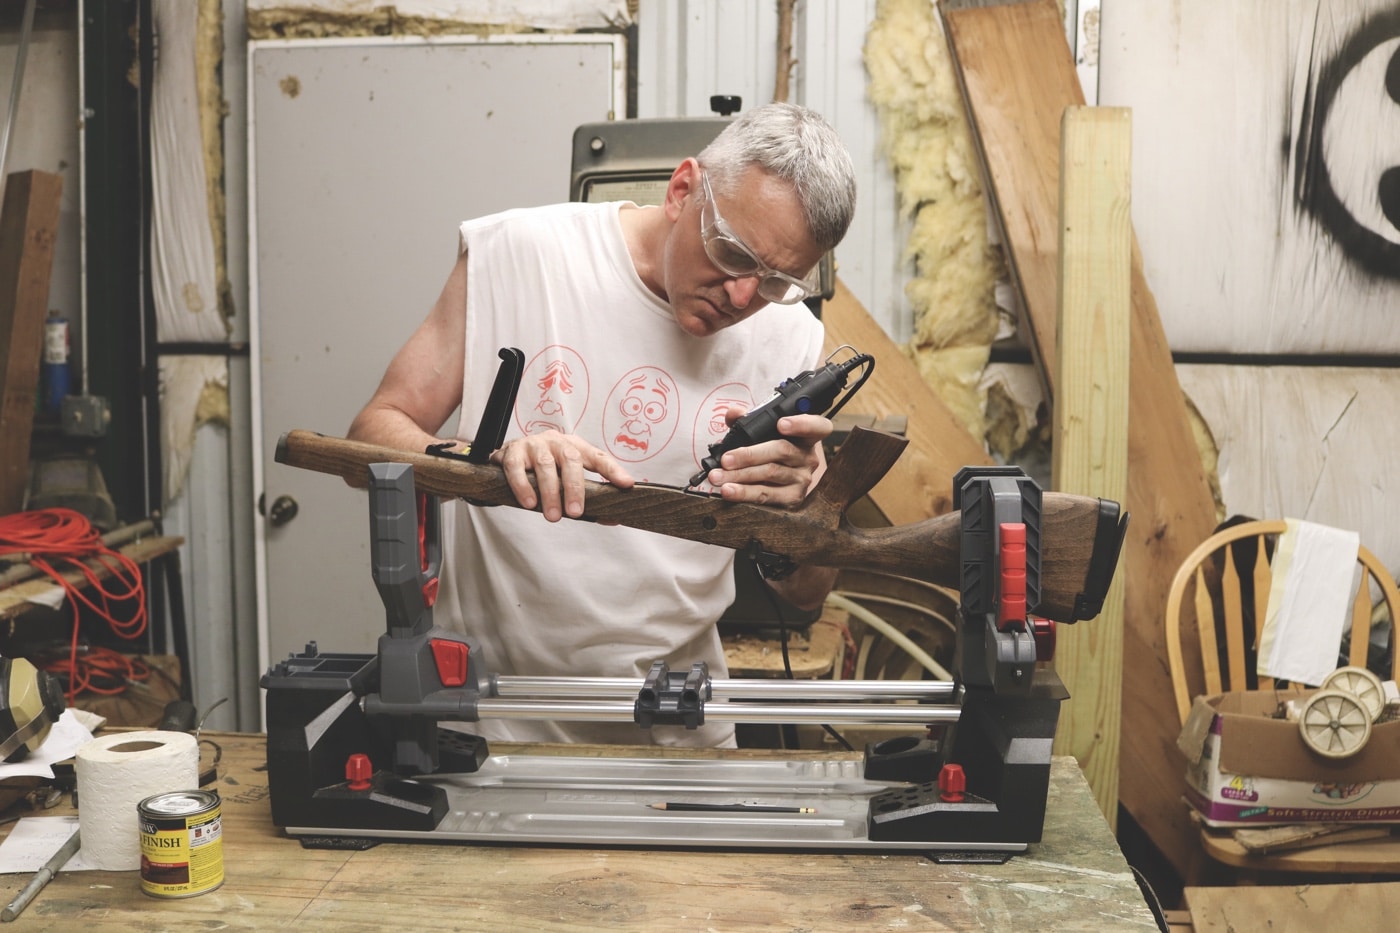
This build project is within the capabilities of most anybody reasonably handy with tools. It requires more patience than skill. Image: Author
The SARCO M14E2 stock is stripped and unfinished, but beautifully executed.
Original stocks were cut from birch, which is both hard and durable.
SARCO had theirs made from American beech, which is even more so.
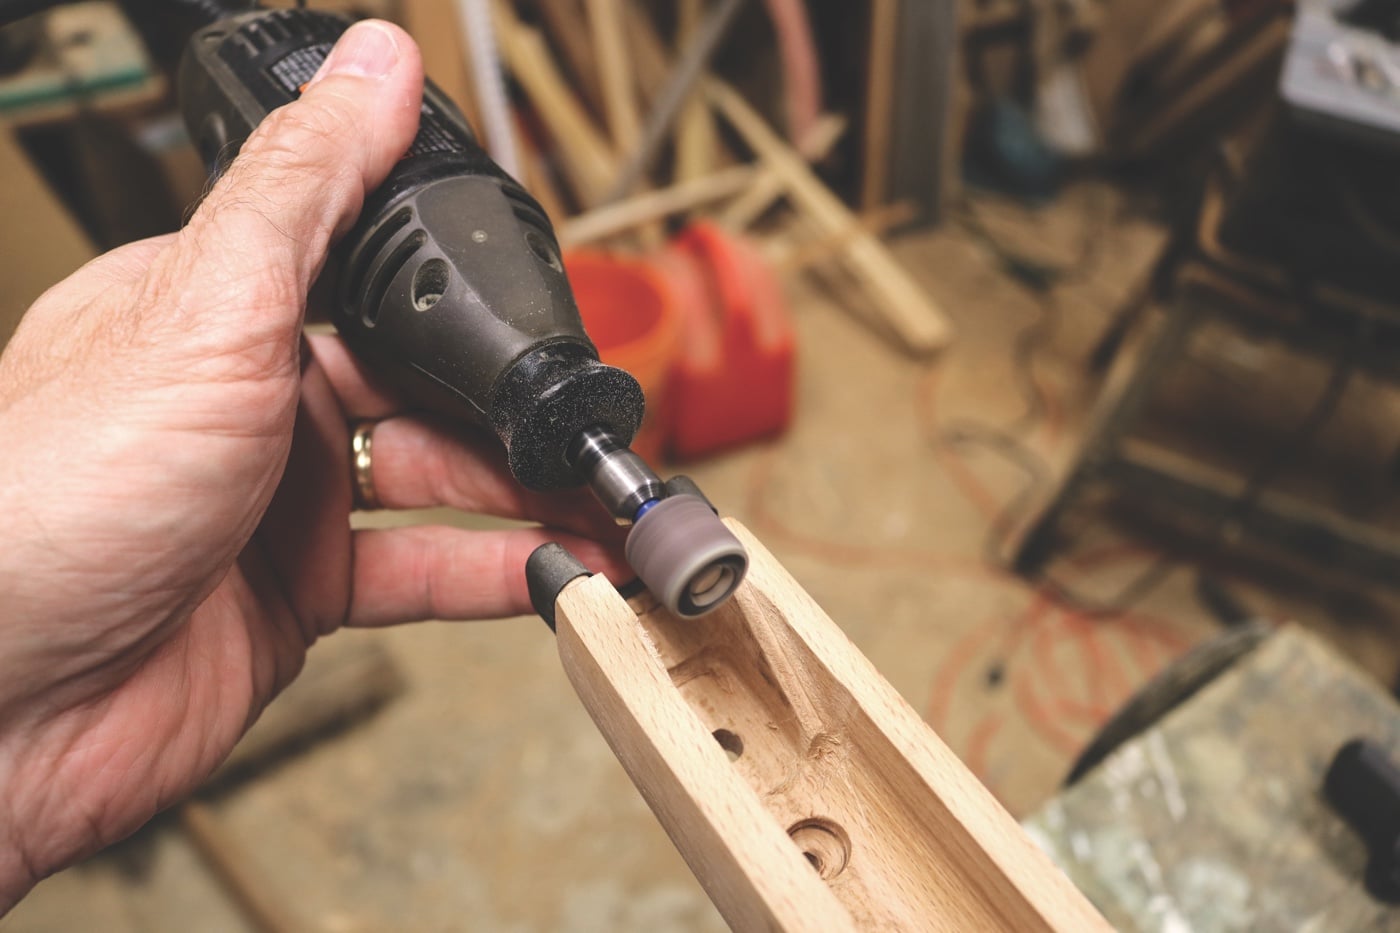
A sanding drum on a Dremel is the ideal tool for shaping the stock to accept the rifle’s action. Image: Author
I found the quality to be superb.
The SARCO M14E2 stock hardware set includes the front grip along with the internal mounting rail and installation screws.
Like the originals, the grip folds fore and aft as desired.
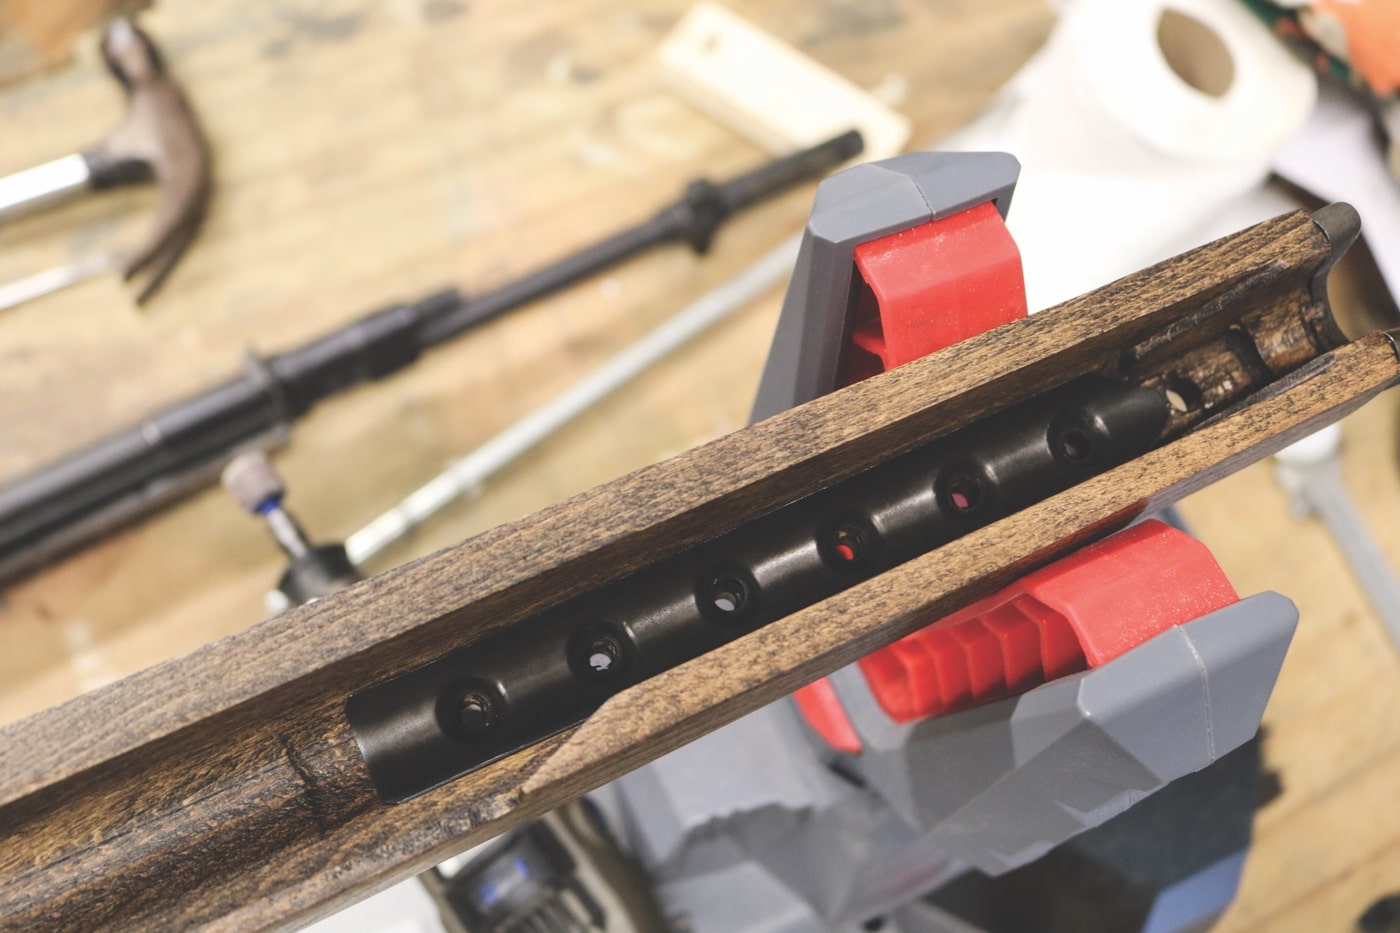
There is a pressed steel insert in the forearm to support the forward hand grip. Image: Author
Some of this stuff is original, but much of it is newly manufactured.
Quality, like that of the stock, is unimpeachable.
SARCO also offers original distinctive synthetic slotted handguards as well.

The author’s finished M14E2 clone turned out to be a beautiful example of a modified M1A rifle. Image: Jake Miller/Springfield Armory
That left a false selector switch and slip-on muzzle stabilizer for me to find.
Google is your buddy for those last two items.
I wanted to prove that a normal dude with normal mechanical proclivities could pull this off.

The author’s build of the M14E2 from SARCO and Springfield parts on an M1A resulted in a very convincing reproduction of the original design. Image: Jake Miller/Springfield Armory
Youll need a Dremel tool.
If you dont already have one, I sure wouldnt admit that to anybody.
The SARCO stock is intentionally tight in places.

Youll need to strategically tweak the wood back in places to get the components to fit.
There is a steel insert that fits inside inlets in the stock to support the rifle chassis.
I suggest fitting the insert to your action before mounting it in the stock.
It should slide in and out readily without being loose.
I found that a cutoff wheel on the Dremel worked fine.
Wear safety glasses throughout unless you want to rock a cool eyepatch.
Fitting the steel insert into the stock was the most tedious part of the build.
Just slowly tease back the front bit of the magwell with your Dremel until the length is right.
The steel insert is held in place via two-hole proprietary fasteners.
Brownells sells an appropriate driver bit that will fit in a standard screwdriver.
However, Im cheap, and I wanted to complete this project with a minimum of extraneous expense.
The steel front end cap on the stock is called a ferrule.

The originals were crimped in place at the factory.
It will remain in place until the sun burns out.
Drop the action back in place and repeat as necessary until everything jives.

Settling the action in place took a while but resulted in a factory-tight interface between wood and steel.
Once I had everything fitted, I stripped the stock back down and stained it with walnut oil stain.
Final assembly requires little more than a screwdriver.

But basically, I was done.
However, that wasnt my mission here.
The end result is utterly reliable, fun to run, and sets me apart from my peers.

The fact that I made it myself offers a little extra special pride of ownership.
Once you add everything up, this admittedly isnt a cheap project.
However, its not stupid expensive, either.

It cost me a single Saturday.
Getting there is indeed half the fun.
